 Redux Toolkit
Intermediate Tutorial: Redux Toolkit in Action
In the Basic Tutorial, you saw the main API functions that are included in Redux Toolkit, and some short examples of why and how to use them. You also saw that you can use Redux and RTK from a plain JS script tag in an HTML page, without using React, NPM, Webpack, or any build tools.
In this tutorial, you'll see how to use those APIs in a small React app. Specifically, we're going to convert the original Redux "todos" example app to use RTK instead.
This will show several concepts:
- How to convert "plain Redux" code to use RTK
- How to use RTK in a typical React+Redux app
- How some of the more powerful features of RTK can be used to simplify your Redux code
Also, while this isn't specific to RTK, we'll look at a couple ways you can improve your React-Redux code as well.
The complete source code for the converted application from this tutorial is available at github.com/reduxjs/rtk-convert-todos-example. We'll be walking through the conversion process as shown in this repo's history. Links to meaningful individual commits will be highlighted in quote blocks, like this:
- Commit message here
Reviewing the Redux Todos Example
If we inspect the current "todos" example source code, we can observe a few things:
- The
todosreducer function is doing immutable updates "by hand", by copying nested JS objects and arrays - The
actionsfile has hand-written action creator functions, and the action type strings are being duplicated between the actions file and the reducer files - The code is laid out using a "folder-by-type" structure, with separate files for
actionsandreducers - The React components are written using a strict version of the "container/presentational" pattern, where the "presentational" components are in one folder, and the Redux "container" connection definitions are in a different folder
- Some of the code isn't following some of the recommended Redux "best practices" patterns. We'll look at some specific examples as we go through this tutorial.
On the one hand, this is a small example app. It's meant to illustrate the basics of actually using React and Redux together, and not necessarily be used as "the right way" to do things in a full-scale production application. On the other hand, most people will use patterns they see in docs and examples, and there's definitely room for improvement here.
Initial Conversion Steps
Adding Redux Toolkit to the Project
Since the original todos example is in the Redux repo, we start by copying the Redux "todos" source code to a fresh Create-React-App project, and adding Prettier to the project to help make sure the code is formatted consistently. There's also a jsconfig.json file to enable us to use "absolute import paths" that start from the /src folder.
In the Basic Tutorial, we just linked to Redux Toolkit as an individual script tag. But, in a typical application, you need to add RTK as a package dependency in your project. This can be done with either the NPM or Yarn package managers:
# If you're using NPM:npm install @reduxjs/toolkit
# Or for Yarn:yarn add @reduxjs/toolkitOnce that's complete, you should add and commit the modified package.json file and the "lock file" from your package manager (package-lock.json for NPM, or yarn.lock for Yarn).
With that done, we can start to work on the code.
Converting the Store to Use configureStore
Just like with the "counter" example, we can replace the plain Redux createStore function with RTK's configureStore. This will automatically set up the Redux DevTools Extension for us.
The changes here are simple. We update src/index.js to import configureStore instead of createStore, and replace the function call. Remember that configureStore takes an options object as a parameter with named fields, so instead of passing rootReducer directly as the first parameter, we pass it as an object field named reducer:
import React from "react";import { render } from "react-dom";-import { createStore } from "redux";+import { configureStore } from "@reduxjs/toolkit";import { Provider } from "react-redux";import App from "./components/App";import rootReducer from "./reducers";
- const store = createStore(rootReducer);+ const store = configureStore({+ reducer: rootReducer,+});Note that we're still using the same root reducer function that's already in the application, and a Redux store is still being created. All that's changed is the store is automatically set up with tools to aid you in development.
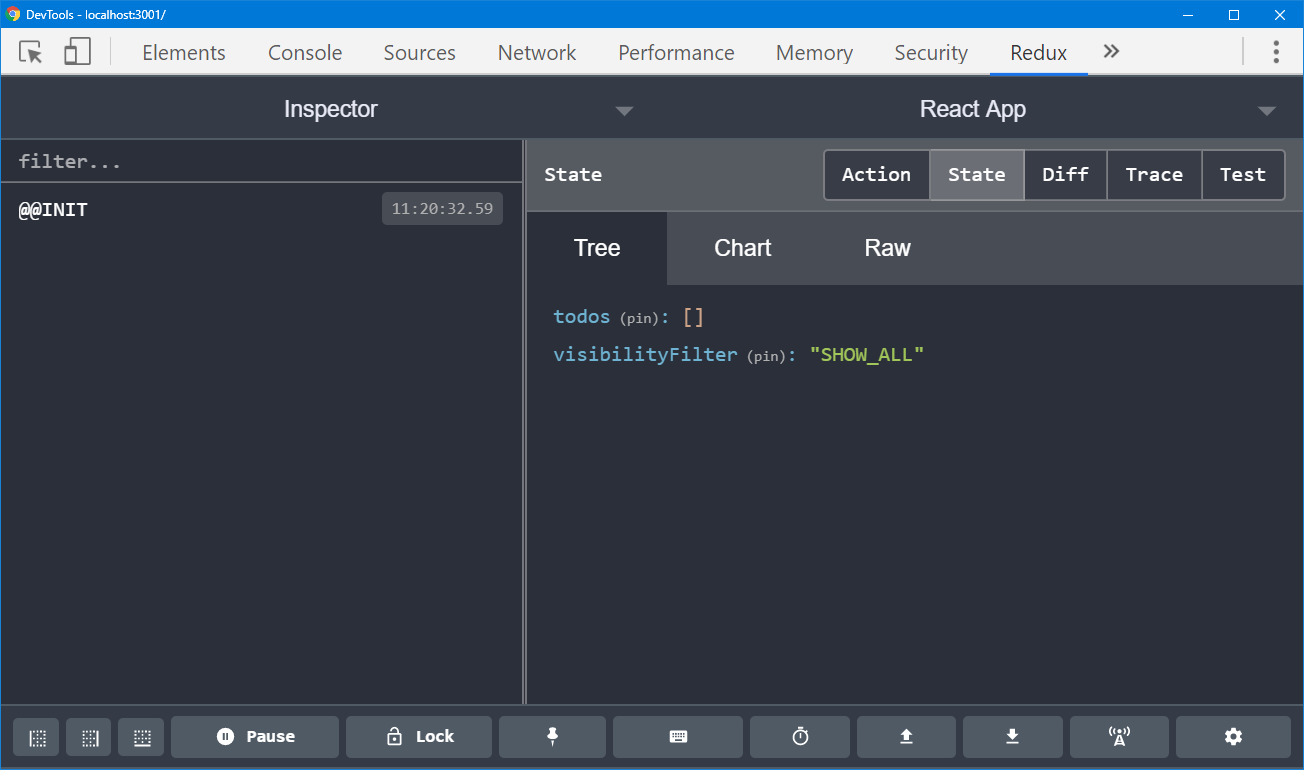
If you have the Redux DevTools browser extension installed, you should now be able to see the current state if you start the application in development mode and open the DevTools Extension. It should look like this:
Creating the Todos Slice
The first big step for rewriting the app is to convert the todos logic into a new "slice".
Understanding Slices
Right now, the todos code is split into two parts. The reducer logic is in reducers/todos.js, while the action creators are in actions/index.js. In a larger app, we might even see the action type constants in their own file, like constants/todos.js, so they can be reused in both places.
We could replace those using RTK's createReducer and createAction functions. However, the RTK createSlice function allows us to consolidate that logic in one place. It uses createReducer and createAction internally, so in most apps, you won't need to use them yourself - createSlice is all you need.
You may be wondering, "what is a 'slice', anyway?". A normal Redux application has a JS object at the top of its state tree, and that object is the result of calling the Redux combineReducers function to join multiple reducer functions into one larger "root reducer". We refer to one key/value section of that object as a "slice", and we use the term "slice reducer" to describe the reducer function responsible for updating that slice of the state.
In this app, the root reducer looks like:
import todos from './todos'import visibilityFilter from './visibilityFilter'
export default combineReducers({ todos, visibilityFilter})So, the combined state looks like {todos: [], visibilityFilter: "SHOW_ALL"}. state.todos is a "slice", and the todos reducer function is a "slice reducer".
Examining the Original Todos Reducer
The original todos reducer logic looks like this:
const todos = (state = [], action) => { switch (action.type) { case 'ADD_TODO': return [ ...state, { id: action.id, text: action.text, completed: false } ] case 'TOGGLE_TODO': return state.map(todo => todo.id === action.id ? { ...todo, completed: !todo.completed } : todo ) default: return state }}
export default todosWe can see that it handles three cases:
- It adds a new todo by copying the existing
statearray and adding a new todo entry at the end - It handles toggling a todo entry by copying the existing array using
state.map(), copies and replaces the todo object that needs to be updated, and leaves all other todo entries alone. - It responds to all other actions by returning the existing state (effectively saying "I don't care about that action").
It also initializes the state with a default value of [], and does a default export of the reducer function.
Writing the Slice Reducer
We can do the same work with createSlice, but we can do it in a simpler way.
We'll start by adding a new file called /features/todos/todosSlice.js. Note that while it doesn't matter how you actually structure your folders and files, we've found that a "feature folder" approach usually works better for most applications. The file name is also entirely up to you, but a convention of someFeatureSlice.js is reasonable to use.
In this file, we'll add the following logic:
import { createSlice } from '@reduxjs/toolkit'
const todosSlice = createSlice({ name: 'todos', initialState: [], reducers: { addTodo(state, action) { const { id, text } = action.payload state.push({ id, text, completed: false }) }, toggleTodo(state, action) { const todo = state.find(todo => todo.id === action.payload) if (todo) { todo.completed = !todo.completed } } }})
export const { addTodo, toggleTodo } = todosSlice.actions
export default todosSlice.reducercreateSlice Options
Let's break down what this does:
createSlicetakes an options object as its argument, with these options:name: a string that is used as the prefix for generated action typesinitialState: the initial state value for the reducerreducers: an object, where the keys will become action type strings, and the functions are reducers that will be run when that action type is dispatched. (These are sometimes referred to as "case reducers", because they're similar to acasein aswitchstatement)
So, the addTodo case reducer function will be run when an action with the type "todos/addTodo" is dispatched.
There's no default handler here. The reducer generated by createSlice will automatically handle all other action types by returning the current state, so we don't have to list that ourselves.
"Mutable" Update Logic
Notice that the addTodo reducer is calling state.push(). Normally, this is bad, because the array.push() function mutates the existing array, and Redux reducers must never mutate state!.
However, createSlice and createReducer wrap your function with produce from the Immer library. This means you can write code that "mutates" the state inside the reducer, and Immer will safely return a correct immutably updated result.
Similarly, toggleTodo doesn't map over the array or copy the matching todo object. Instead, it just finds the matching todo object, and then mutates it by assigning todo.completed = !todo.completed. Again, Immer knows this object was updated, and makes copies of both the todo object and the containing array.
Normal immutable update logic tends to obscure what you're actually trying to do because of all of the extra copying that has to happen. Here, the intent should be much more clear: we're adding an item to the end of an array, and we're modifying a field in a todo entry.
Exporting the Slice Functions
createSlice returns an object that looks like this:
{ name: "todos", reducer: (state, action) => newState, actions: { addTodo: (payload) => ({type: "todos/addTodo", payload}), toggleTodo: (payload) => ({type: "todos/toggleTodo", payload}) }, caseReducers: { addTodo: (state, action) => newState, toggleTodo: (state, action) => newState, }}Notice that it auto-generated the appropriate action creator functions and action types for each of our reducers - we don't have to write those by hand!
We'll need to use the action creators and the reducer in other files, so at a minimum we would need to export the slice object. However, we can use a Redux community code convention called the "ducks" pattern. Simply put, it suggests that you should put all your action creators and reducers in one file, do named exports of the action creators, and a default export of the reducer function.
Thanks to createSlice, we already have our action creators and the reducer right here in one file. All we have to do is export them separately, and our todos slice file now matches the common "ducks" pattern.
Working with Action Payloads
Speaking of the action creators, let's go back and re-examine the reducer logic for a minute.
By default, the action creators from the RTK createAction function only accept one argument. That argument, whatever it is, is put into the action object as a field called payload.
There's nothing special about the field action.payload by itself. Redux doesn't know or care about that name. But, like "ducks", the name payload comes from another Redux community convention called "Flux Standard Actions".
Actions usually need to include some extra data along with the type field. The original Redux code for addTodo has an action object that looks like {type, id, text}. The FSA convention suggests that rather than having data fields with random names directly in the action object, you should always put your data inside a field named payload.
It's up to the reducer to establish what it thinks payload should be for each action type, and whatever code dispatches the action needs to pass in values that match that expectation. If only one value is needed, you could potentially use that as the whole payload value directly. More commonly, you'd need to pass in multiple values, in which case payload should be an object containing those values.
In our todos slice, addTodo needs two fields, id and text, so we put those into an object as payload. For toggleTodo, the only value we need is the id of the todo being changed. We could have made that the payload, but I prefer always having payload be an object, so I made it action.payload.id instead.
(As a sneak peek: there is a way to customize how action object payloads are created. We'll look at that later in this tutorial, or you can look through the createAction API docs for an explanation.)
Updating the Todos Tests
The original todos reducer has a tests file with it. We can port those over to work with our todos slice, and verify that they both work the same way.
The first step is to copy reducers/todos.spec.js over to features/todos/todosSlice.spec.js, and change the import path to read the reducer from the slice file.
Once that is done, we need to update the tests to match how RTK works.
The first issue is that the test file hardcodes action types like 'ADD_TODO'. RTK's action types look like 'todos/addTodo'. We can reference that by also importing the action creators from the todos slice, and replacing the original type constants in the test with addTodo.type.
The other problem is that the action objects in the tests look like {type, id, text}, whereas RTK always puts those extra values inside action.payload. So, we need to modify the test actions to match that.
(We really could just replace all the inline action objects in the test with calls like addTodo({id : 0, text: "Buy milk"}), but this is a simpler set of changes to show for now.)
An example of the changes would be:
// Change the imports to get the action creators-import todos from './todosSlice'+import todos, { addTodo, toggleTodo } from './todosSlice'// later, in a test: it('should handle ADD_TODO', () => { expect( todos([], {- type: 'ADD_TODO',- text: 'Run the tests',- id: 0+ type: addTodo.type,+ payload: {+ text: 'Run the tests',+ id: 0+ } }) ).toEqual([After those changes, all the tests in todosSlice.spec.js should pass, proving that our new RTK slice reducer works exactly the same as the original hand-written reducer!
Implementing Todo IDs
In the original code, each newly added todo gets an ID value from an incrementing number:
let nextTodoId = 0export const addTodo = text => ({ type: 'ADD_TODO', id: nextTodoId++, text})Right now, our todos slice doesn't do that, because the addTodo action creator is automatically generated for us.
We could add that behavior for requiring that whatever code dispatches the add todo should have to pass in a new ID, like addTodo({id: 1, text: "Buy milk"}), but that would be annoying. Why should the caller have to track that value? Also, what if there are multiple parts of the app that would need to dispatch that action? It would be better to encapsulate that logic in the action creator.
RTK allows you to customize how the payload field is created in your action objects. If you are using createAction by itself, you can pass a "prepare callback" as the second argument. Here's what this would look like:
let nextTodoId = 0
export const addTodo = createAction('ADD_TODO', text => { return { payload: { id: nextTodoId++, text } }})Note that the "prepare callback" must return an object with a field called payload inside! Otherwise, the action's payload will be undefined. It may also include a field called meta, which can be used to include extra additional metadata related to the action.
If you're using createSlice, it automatically calls createAction for you. If you need to customize the payload there, you can do so by passing an object containing reducer and prepare functions to the reducers object, instead of just the reducer function by itself:
let nextTodoId = 0
const todosSlice = createSlice({ name: 'todos', initialState: [], reducers: { addTodo: { reducer(state, action) { const { id, text } = action.payload state.push({ id, text, completed: false }) }, prepare(text) { return { payload: { text, id: nextTodoId++ } } } } }}We can add an additional test that confirms this works:
describe('addTodo', () => { it('should generate incrementing todo IDs', () => { const action1 = addTodo('a') const action2 = addTodo('b')
expect(action1.payload).toEqual({ id: 0, text: 'a' }) expect(action2.payload).toEqual({ id: 1, text: 'b' }) })})Using the New Todos Slice
Updating the Root Reducer
We have a shiny new todos reducer function, but it isn't hooked up to anything yet.
The first step is to go update our root reducer to use the reducer from the todos slice instead of the original reducer. We just need to change the import statement in reducers/index.js:
import { combineReducers } from 'redux'-import todos from './todos'+import todosReducer from 'features/todos/todosSlice'import visibilityFilter from './visibilityFilter'
export default combineReducers({- todos,+ todos: todosReducer, visibilityFilter})While we could have kept the imported function named as todos so that we can use the object literal shorthand with combineReducers, it's a little more clear if we name the imported function todosReducer and define the field as todos: todosReducer.
Updating the Add Todo Component
If we reload the app, we should still see that state.todos is an empty array. But, if we click on "Add Todo", nothing will happen. We're still dispatching actions whose type is 'ADD_TODO', while our todos slice is looking for an action type of 'todos/addTodo'. We need to import the correct action creator and use it in the AddTodo.js file.
While we're at it, there are a couple of other problems with how the AddTodo component is written. First, it's currently using a React "callback ref" to read the current text value from the input when you click "Add Todo". This works, but the standard "React way" to handle form fields is with the "controlled inputs" pattern, where the current field value is stored in the component's state.
Second, the connected component is getting dispatch as a prop. Again, this works, but the normal way to use connect is to pass action creator functions to connect, and then dispatch the actions by calling the functions that were passed in as props.
Since we've got this component open, we can fix those issues too. Here's what the final version looks like:
import React, { useState } from 'react'import { connect } from 'react-redux'import { addTodo } from 'features/todos/todosSlice'
const mapDispatch = { addTodo }
const AddTodo = ({ addTodo }) => { const [todoText, setTodoText] = useState('')
const onChange = e => setTodoText(e.target.value)
return ( <div> <form onSubmit={e => { e.preventDefault() if (!todoText.trim()) { return } addTodo(todoText) setTodoText('') }} > <input value={todoText} onChange={onChange} /> <button type="submit">Add Todo</button> </form> </div> )}
export default connect(null, mapDispatch)(AddTodo)We start by importing the correct addTodo action creator from our todos slice.
The input is now being handled as a standard "controlled input", with the text value being stored in the component's state. We can use that state text value in the form's submit handler.
Finally, we use the "object shorthand" form of mapDispatch to simplify passing the action creators to connect. The "bound" version of addTodo is passed in to the component as a prop, and it will dispatch the action as soon as we call it.
Updating the Todo List
The TodoList and VisibleTodoList components have similar issues: they're using the older toggleTodo action creator, and the connect setup isn't using the "object shorthand" form of mapDispatch. We can fix both of those.
// VisibleTodoList.js-import { toggleTodo } from '../actions'+import { toggleTodo } from 'features/todos/todosSlice'-const mapDispatchToProps = dispatch => ({- toggleTodo: id => dispatch(toggleTodo(id))-})+const mapDispatchToProps = { toggleTodo }And with that, we should now be able to add and toggle todos again, but using our new todos slice!
Creating and Using the Filters Slice
Now that we've created the todos slice and hooked it up to the UI, we can do the same for the filter selection logic as well.
Writing the Filters Slice
The filter logic is really simple. We have one action, which sets the current filter value by returning what's in the action. Here's the whole slice:
import { createSlice } from '@reduxjs/toolkit'
export const VisibilityFilters = { SHOW_ALL: 'SHOW_ALL', SHOW_COMPLETED: 'SHOW_COMPLETED', SHOW_ACTIVE: 'SHOW_ACTIVE'}
const filtersSlice = createSlice({ name: 'visibilityFilters', initialState: VisibilityFilters.SHOW_ALL, reducers: { setVisibilityFilter(state, action) { return action.payload } }})
export const { setVisibilityFilter } = filtersSlice.actions
export default filtersSlice.reducerWe've copied over the VisibilityFilters enum object that was originally in actions/index.js. The slice code just creates the one reducer, we export the action creator and reducer, and we're done.
Using the Filters Slice
As with the todos reducer, we need to import and add the visibility reducer to our root reducer:
import todosReducer from 'features/todos/todosSlice'-import visibilityFilter from './visibilityFilter'+import visibilityFilterReducer from 'features/filters/filtersSlice'export default combineReducers({ todos: todosReducer,- visibilityFilter+ visibilityFilter: visibilityFilterReducer})From there, we need to dispatch the setVisibilityFilter action when the user clicks on the buttons. First, for consistency, we should update VisibleTodoList.js and Footer.js to use the VisibilityFilter enum that's exported from the filter slice file, instead of the one from the actions file.
From there, the link components will take just a bit more work. FilterLink is currently creating new functions that capture the current value of ownProps.filter, so that Link is just getting a function called onClick. While that's a valid way to do it, for consistency we'd like to continue using the object shorthand form of mapDispatch, and modify Link to pass the filter value in when it dispatches the action.
// FilterLink.js-import { setVisibilityFilter } from '../actions'+import { setVisibilityFilter } from 'features/filters/filtersSlice'-const mapDispatchToProps = (dispatch, ownProps) => ({- onClick: () => dispatch(setVisibilityFilter(ownProps.filter))-})+const mapDispatchToProps = { setVisibilityFilter }
// Link.jsimport React from 'react'import PropTypes from 'prop-types'
-const Link = ({ active, children, onClick }) => (+const Link = ({ active, children, setVisibilityFilter, filter }) => ( <button- onClick={onClick}+ onClick={() => setVisibilityFilter(filter)} disabled={active} style={{ marginLeft: '4px' }} > {children} </button>)
Link.propTypes = { active: PropTypes.bool.isRequired, children: PropTypes.node.isRequired,- onClick: PropTypes.func.isRequired+ setVisibilityFilter: PropTypes.func.isRequired,+ filter: PropTypes.string.isRequired}
export default LinkAgain, note that most of this doesn't have to do with RTK specifically, but it's good to try to consistently use some of the recommended best practices in this example code.
With that done, we should be able to add a couple todos, toggle the state of some of them, and then switch the filters to change the display list.
Optimizing Todo Filtering
The VisibleTodoList component currently uses a function called getVisibleTodos to do the work of filtering the todos array for display. This is a "selector function", as described in the Redux docs page on Computing Derived Data. It encapsulates the process of reading values from the Redux store and extracting part or all of those values for use.
However, the code as currently written has a problem. If the filter is set to SHOW_COMPLETED or SHOW_ACTIVE, it will always return a new array every time it is called. Since it's being used in a mapState function, that means it will return a new array reference when any action is dispatched.
In this tiny todo example app, that isn't a problem. The only actions we have involve altering the todos list or filtering it, anyway. But, in a real app, many other actions will be dispatched. Imagine if this todo app had a counter in it, and "INCREMENT" was dispatched while the list is filtered. We would create a new list, and the TodoList would have to re-render even though nothing changed.
While this isn't a real performance issue now, it's worth showing how we can improve the behavior.
Redux apps commonly use a library called Reselect, which has a createSelector function that lets you define "memoized" selector functions. These memoized selectors only recalculate values if the inputs have actually changed.
RTK re-exports the createSelector function from Reselect, so we can import that and use it in VisibleTodoList.
import { connect } from 'react-redux'+import { createSelector } from '@reduxjs/toolkit'import { toggleTodo } from 'features/todos/todosSlice'import TodoList from '../components/TodoList'import { VisibilityFilters } from 'features/filters/filtersSlice'
-const getVisibleTodos = (todos, filter) => {- switch (filter) {- case VisibilityFilters.SHOW_ALL:- return todos- case VisibilityFilters.SHOW_COMPLETED:- return todos.filter(t => t.completed)- case VisibilityFilters.SHOW_ACTIVE:- return todos.filter(t => !t.completed)- default:- throw new Error('Unknown filter: ' + filter)- }-}+const selectTodos = state => state.todos+const selectFilter = state => state.visibilityFilter+const selectVisibleTodos = createSelector(+ [selectTodos, selectFilter],+ (todos, filter) => {+ switch (filter) {+ case VisibilityFilters.SHOW_ALL:+ return todos+ case VisibilityFilters.SHOW_COMPLETED:+ return todos.filter(t => t.completed)+ case VisibilityFilters.SHOW_ACTIVE:+ return todos.filter(t => !t.completed)+ default:+ throw new Error('Unknown filter: ' + filter)+ }+ }+)const mapStateToProps = state => ({- todos: getVisibleTodos(state.todos, state.visibilityFilter)+ todos: selectVisibleTodos(state)})
const mapDispatchToProps = { toggleTodo }First, we import createSelector from RTK, and define a couple one-line selector functions that grab the todos and visibilityFilter fields from their state argument.
We then call createSelector, and pass those two small selector functions in the "input selectors" array. createSelector will call those, take the return values, and pass those to the "output selector" we've defined, which can then do the filtering and return the final result.
There's a couple small changes in how this is defined and used. While you can give selector functions any name you want, selectX is a more common naming convention than getX. Also, because the input selectors take care of reading the necessary values, we can just call selectVisibleTodos(state), with state as the only argument.
If we re-run the app, the filtering logic should work exactly the same as before from what you can see in the UI.
Cleanup
That's the end of the actual conversion work. We now have a bunch of action and reducer files that are no longer being used, so we should delete those to clean up the project.
We can safely remove actions/index.js, reducers/todos.js, reducers/visibilityFilter.js, and the associated test files.
We can also try completely switching from the "folder-by-type" structure to a "feature folder" structure, by moving all of the component files into the matching feature folders.
If we do that, the final source code structure looks like this:
/src/componentsApp.js
/features/filtersFilterLink.jsfiltersSlice.jsFooter.jsLink.js
/todosAddTodo.jsTodo.jsTodoList.jstodosSlice.jstodosSlice.spec.jsVisibleTodoList.js
/reducersindex.js
index.js
Everyone has different preferences on what makes a "maintainable" folder structure, but overall that result looks pretty consistent and easy to follow.
Now, let's see the final version of the code in action!
Summary
In this tutorial, you saw:
- How to use RTK in a typical React application, including adding the package, writing "slice" files, and dispatching actions from React components
- How to use "mutable" reducers, prepare action payloads, and write selector functions
- Some techniques for simplifying React-Redux code, like using the "object shorthand" form of
mapDispatch - Examples of using a "feature folder" structure for organizing your code.
Hopefully that has helped illustrate how to actually use these methods in practice.
Coming soon: an Advanced Tutorial, where we'll look at how to use RTK in an app that does async data fetching and uses TypeScript.